Start by finding where the water goes
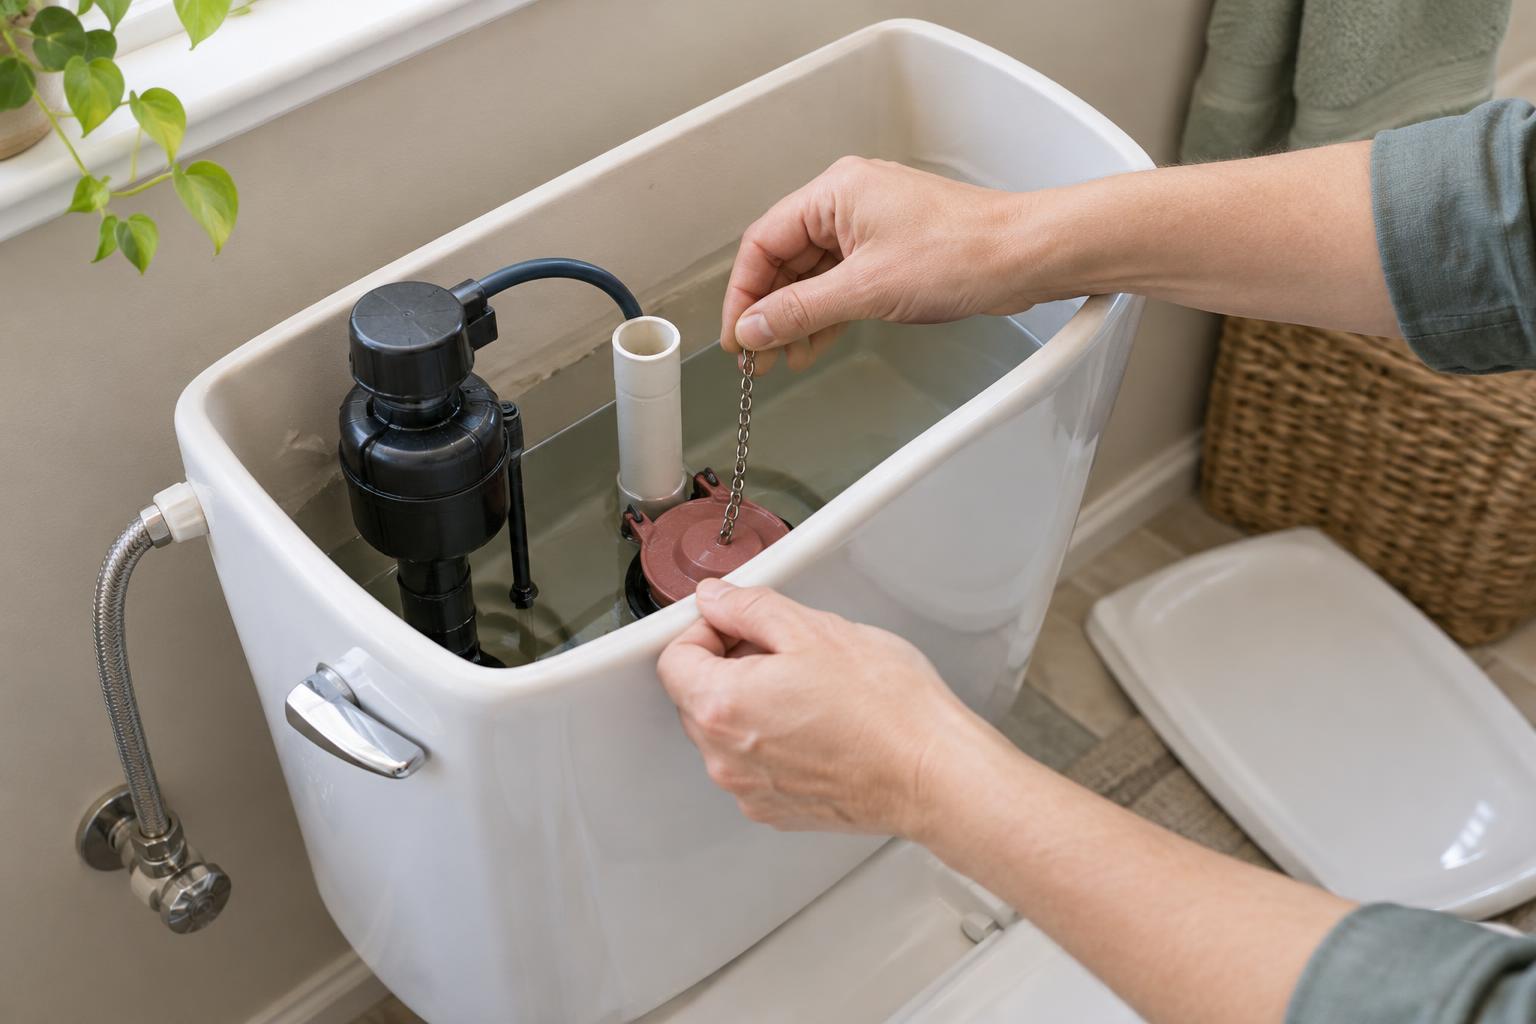
A toilet that runs after a flush may be sending water into the bowl, down the overflow tube or both. Before buying a part, lift the tank lid carefully and set it on a stable, padded surface. Flush once and watch the tank refill. The large opening at the bottom is covered by a rubber flapper or similar seal. The upright tube near it is the overflow tube. The fill valve, usually on the opposite side, controls incoming water.
If water continues to trickle into the overflow tube, the tank is filling too high or the fill valve is not shutting off. If the water level sits below the top of that tube but the toilet periodically refills on its own, water may be leaking past the flapper into the bowl. A short refill immediately after flushing is normal; repeated refilling long afterward is a clue that something needs attention.
Check the flapper and its chain
Turn off the toilet’s water supply using the valve near the wall or floor, then flush to lower the tank water. Look at the flapper and the surface it rests on. Mineral buildup, a twisted flapper or a chain caught beneath it can prevent a good seal. Clear loose debris with a soft cloth, straighten the flapper and check that the chain has a little slack when the handle is at rest. A chain pulled tight can hold the flapper open; one that is much too long may not lift it fully.
If the flapper feels brittle, misshapen or unusually soft, replacing it may be simpler than trying to clean it. Take the old part or a clear photo of the tank mechanism when choosing a replacement, since designs vary. Follow the part’s instructions, attach it without forcing the fittings and restore the water supply to test several flushes.
For a less obvious leak, add a few drops of food coloring to the tank after it has finished filling. Do not flush. If color appears in the bowl after a while, water is passing from the tank into the bowl. Clean or replace the seal and test again.
Adjust the water level and fill valve
If water is flowing into the overflow tube, look for a marked waterline inside the tank or consult the toilet’s instructions. The finished water level should sit below the top of the overflow tube. Many fill valves have an adjustment screw or clip that changes the float height. Make a small adjustment, flush and let the tank refill completely before deciding whether it worked. Avoid bending parts unless the manufacturer’s instructions call for it.
A float that rubs against the tank wall or another component may not rise freely. Reposition it if the design allows. If the float moves normally but the fill valve keeps admitting water, the valve or its seal may need replacement. Shut off the supply and follow the replacement part’s directions, including any steps for draining the remaining tank water. Keep a towel and shallow container nearby for drips. If the shutoff valve will not close reliably, stop rather than disconnecting the supply line.
Test the repair without creating a new leak
After an adjustment or replacement, open the supply valve slowly and check for moisture around any connection you touched. Flush several times. Confirm that the flapper settles flat, the tank fills to an appropriate level and the water stops. Listen again later for unexpected refilling. Tighten connections only as directed: porcelain and plastic parts can crack if forced.
A small replaceable part can keep a serviceable toilet in use and prevent ongoing water waste. But not every problem belongs on a do-it-yourself list. Get help if the tank or bowl is cracked, water appears outside the toilet, the supply valve fails, or a compatible replacement still does not stop the running. Knowing where the fault lies makes that conversation easier, even when you choose not to do the repair yourself.